
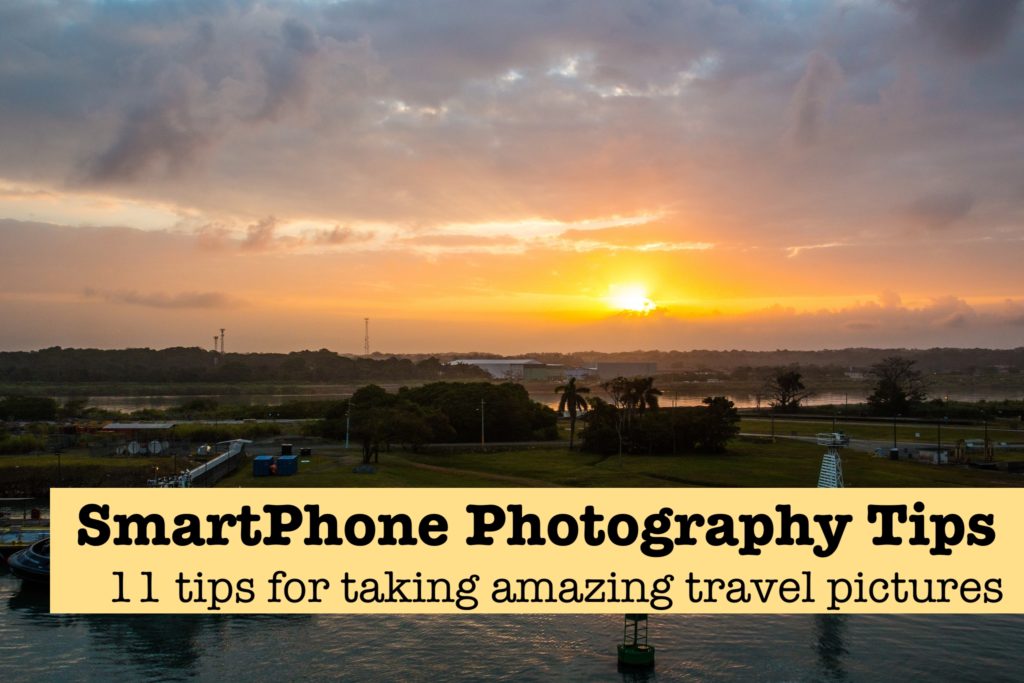
Smartphone Travel Photography Tips – How to take amazing travel photographs with an iPhone and iPad
In this article I give you 12 easy tips on how to take amazing travel photographs with just your SmartPhone or Tablet. After reading the article download my free eBook “SmartPhone Travel Photography Tips For Travellers” with all the tips and lots more examples. Link at the end of the article.
Everywhere I travel I observe people around me taking pictures with their SmartPhones and Tablets, knowing that many will be disappointed with what they capture. Not due to the equipment but because they are not approaching it the best way. It is possible to take amazing travel images with just your phone or tablet. You do not require expensive equipment and lots of training. You will take remarkable travel photographs with your SmartPhone, like an Apple iPhone, or Tablet, like the iPad, by simply following and putting into practice the tips in this article.
SmartPhone versus DSLR
The purpose of travel photography is to make a record of your journey and experiences. A SmartPhone can do this. In fact it may be the easiest and best option, as you do not have to learn and master the settings of a complex larger DSLR camera. It is lighter and more portable. There is no need to understand or play around to get the best balance of ISO, Shutter Speed and Aperture settings. There is no need to carry around heavy equipment. And the nimbleness and ease of use of a SmartPhone may increase your chance of getting that magical shot, which may be missed if you had to get out and set up a regular camera.
While a DSLR camera is likely to have better quality lens and capability, you can negate many of those benefits for most travel photography. One obvious exception to this is when you need zoom lens to take shots of animals a distance away on activities like a Safari.
Your iPhone or iPad can be your best camera for taking travel pictures, as long as you approach it right. It takes thinking and acting like a “professional travel photographer” when it comes to what you shoot and how you shoot it. Follow these tips and you should come back from your next trip with great travel photos.
My 12 top tips for taking great travel pictures
#1: Follow and get inspired by great travel photographers
Immerse yourself in and be inspired by great travel photographers. Constantly look at images to get ideas on what to shoot, how to compose and when to take your photographs.
The easiest way is on Instagram. The App is full of brilliant photographers and remarkable pictures of the world. Follow people that you come across to find out what you like and to get ideas of diverse and different ideas and styles. I like to follow popular and motivating hashtags that I know the best travel photographers use.
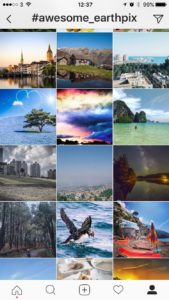
These are some of my favourites:
- #Awesomeglobe https://www.instagram.com/explore/tags/awesomeglobe/
- #awesome_earthpix https://www.instagram.com/explore/tags/awesome_earthpix/
- #Earthfocus https://www.instagram.com/explore/tags/earthfocus/
- #Splendid_shotz https://www.instagram.com/explore/tags/splendid_shotz/
- #earth_shotz https://www.instagram.com/explore/tags/earth_shotz/
You can follow me at http://www.instagram.com/tipsfortravellers
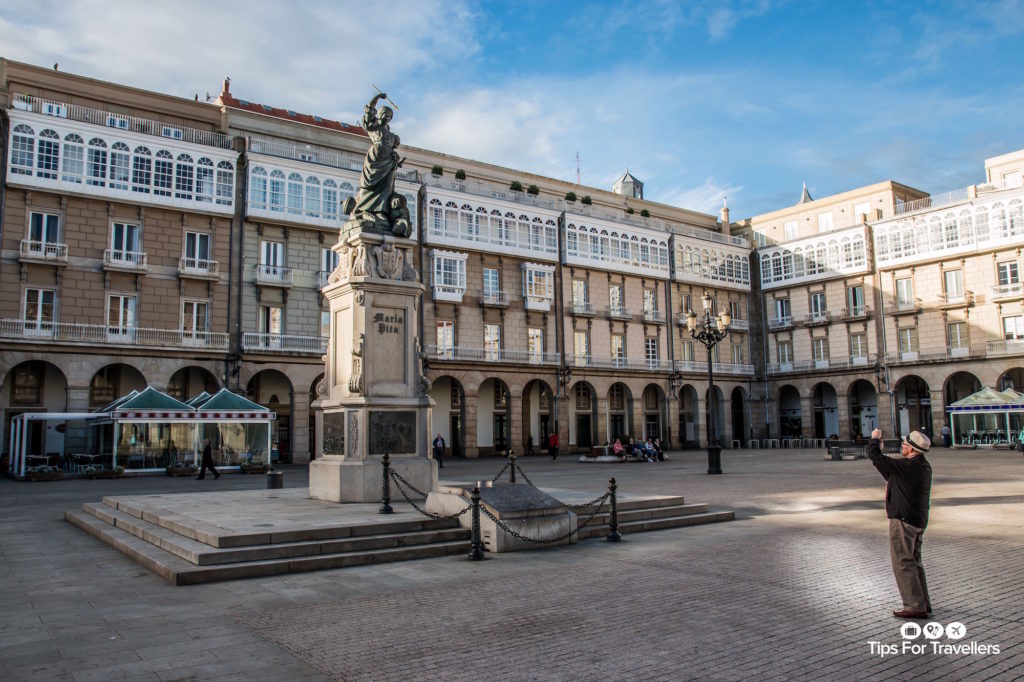
#2: Avoid taking cliché shots, like everyone around you is!
When you visit a destination or attraction step back and look around. You will usually see everyone standing in the one place pointing cameras at the same thing. When travelling you are inevitably going to popular tourist spots, but don’t return home with images looking just like a guidebook and everyone else’s pictures. You should find something that reflects you and your personality more. So avoid shooting exactly like everyone else around you is doing it.
Take one cliché shot and then move away from the pack. Look for a different angle or point of view. Seek out places that no one else is using. Move around, experiment and try to find something unexpected. By walking around the subject and away from everyone you will usually find an intriguing shot. If all else fails then I tell the story of people taking the expected shots by shooting them doing it. It can turn a standard picture into something more interesting, all while still capturing the subject.
Here are some examples:
Include everyone taking the cliché shot into your picture to make it tell its own story!

Taking the cliché shot
Take a picture of someone taking a picture of your subject
Include someone taking the cliché shot
Use someone taking a picture on their own camera or phone to make your picture more interesting and engaging
Take a picture taking a picture
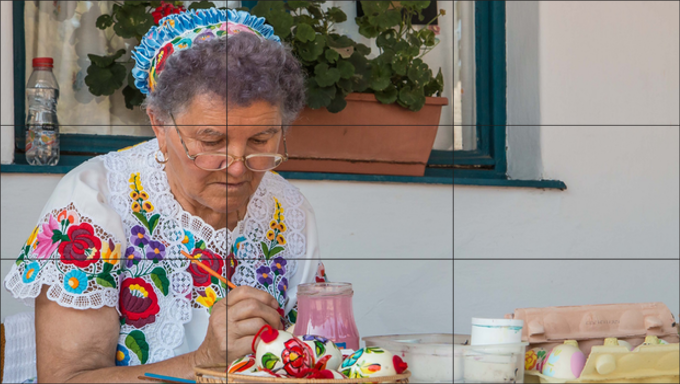
#3: Follow the “Rule of Thirds”
Never put the subject in the middle of your picture! This is the biggest mistake people make. Our natural inclination seems to be to place whatever we are shooting in the centre of the frame. However, professional photographers do not do this. It is more appealing and interesting to have the subject off centre.
Most SmartPhones and Tables will let you switch on a grid that divides the screen into thirds (a bit like the grid used for “noughts and crosses”). I keep it permanently enabled, but if you do not want to them always not picture the grid in your mind. Then use that to place your subject.
So when taking a picture of a person have them off centre like this
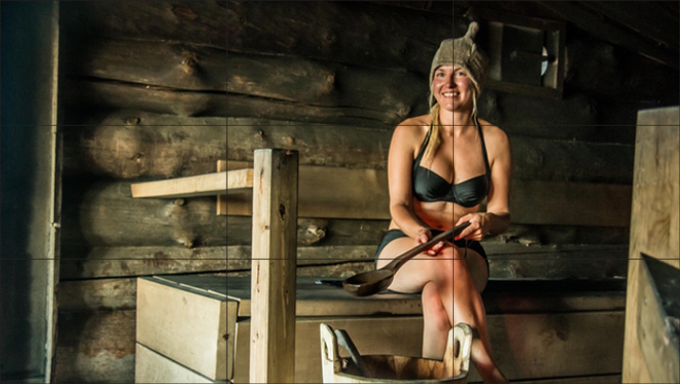
Using the rule of thirds
Using the rule of thirds
If taking a landscape follow the same approach, and have the sky, ocean or mountains fill up two thirds of the picture like this
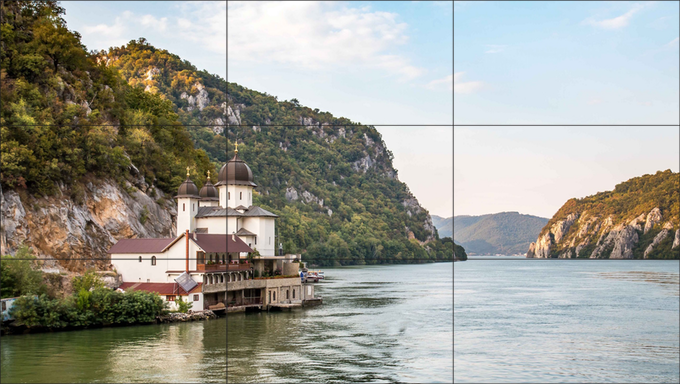
landscape using rule of thirds
#4: Frame the subject
Use things like door frames, overhanging trees, arches or other shapes to frame your subject. It makes more interesting pictures and draws the viewer’s eye to what you want to feature and get them to focus on. It can bring intrigue and more of a story to the picture. It works especially well with landscapes where there is not a lot of detail to make the image more engaging.
For example, look at how I used of the outline of a window to frame the gardens beyond or the arches leading out to a fountain in the courtyard in La Antigua Guatemala
Using window to frame the picture
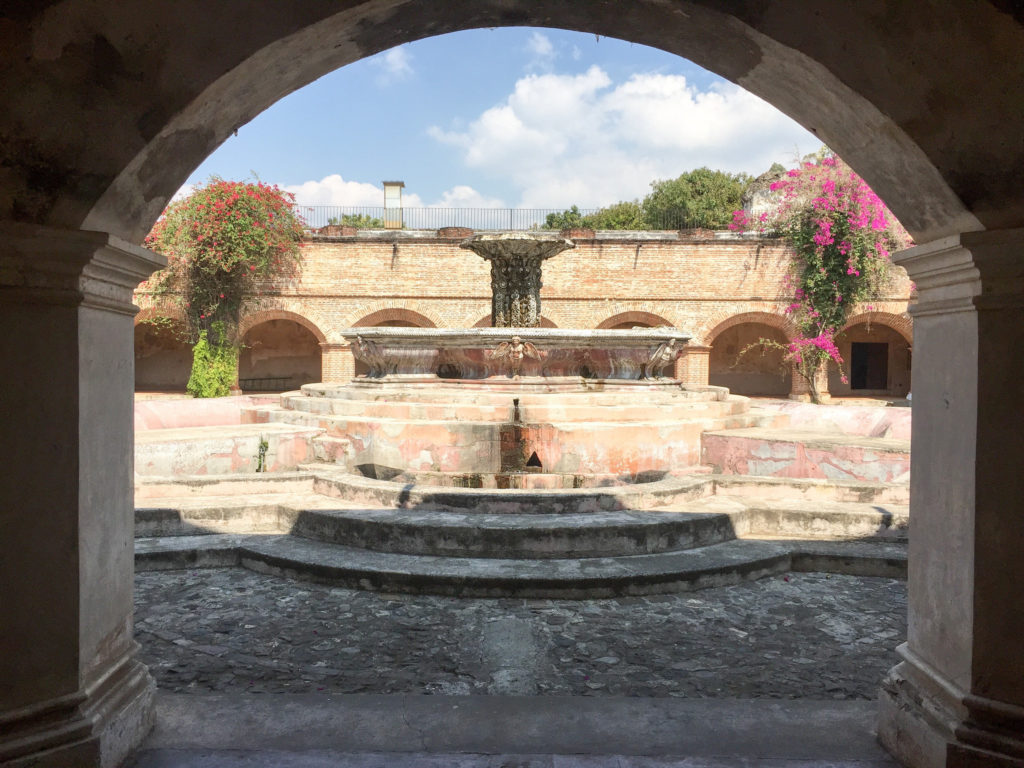
Using an arch to frame the picture
Or the use of the buildings and balcony to frame the blue sea in the distance
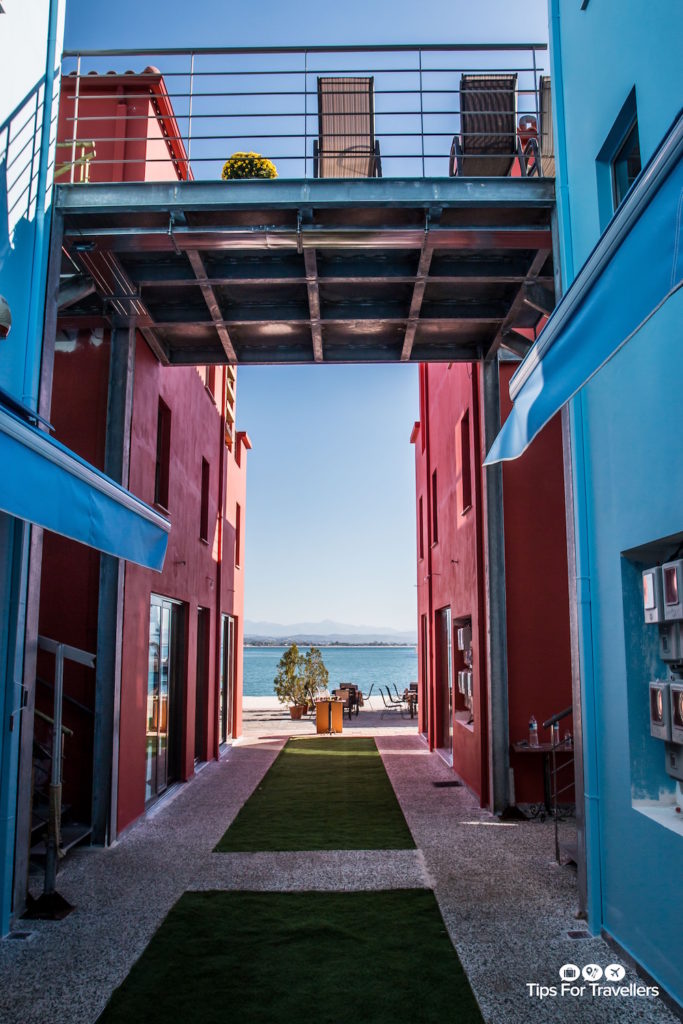
Using buildings to frame the picture
#5: Use leading lines that lead the viewer’s eye
Look for lines that will drive the viewer towards a focal point of the subject. This includes stairs, lines, roads or shapes.
For example, the lines on the floor of the Saturn V hall at Kennedy Space Center

Using leading lines
Or the paving stones in this quay in Croatia
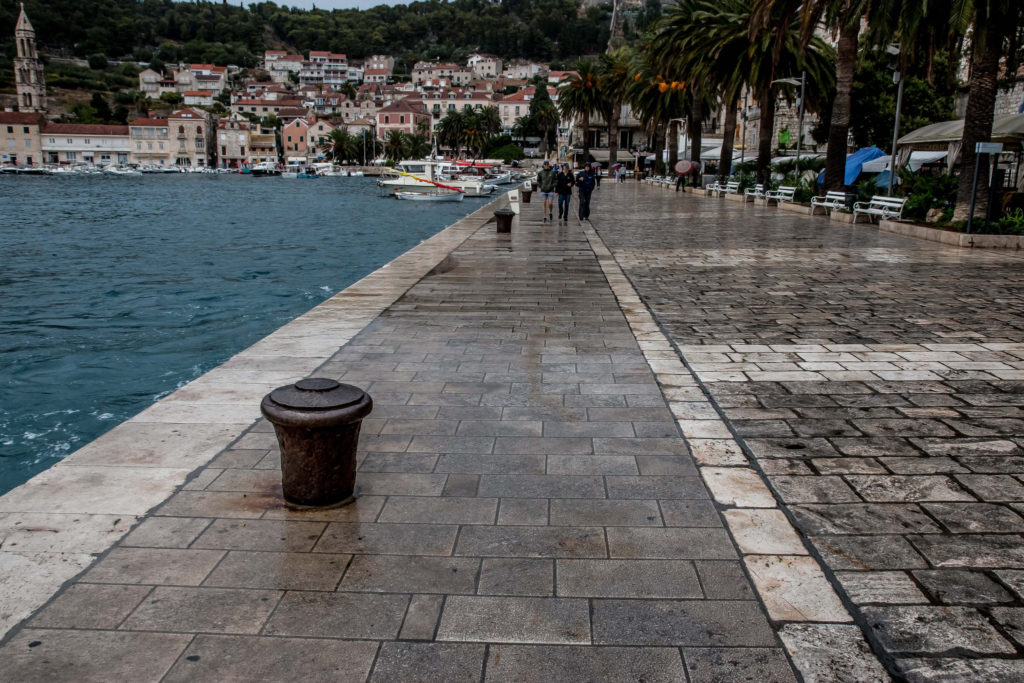
Using leading lines
Or using the pathway to lead the viewer to notice the hikers in this picture
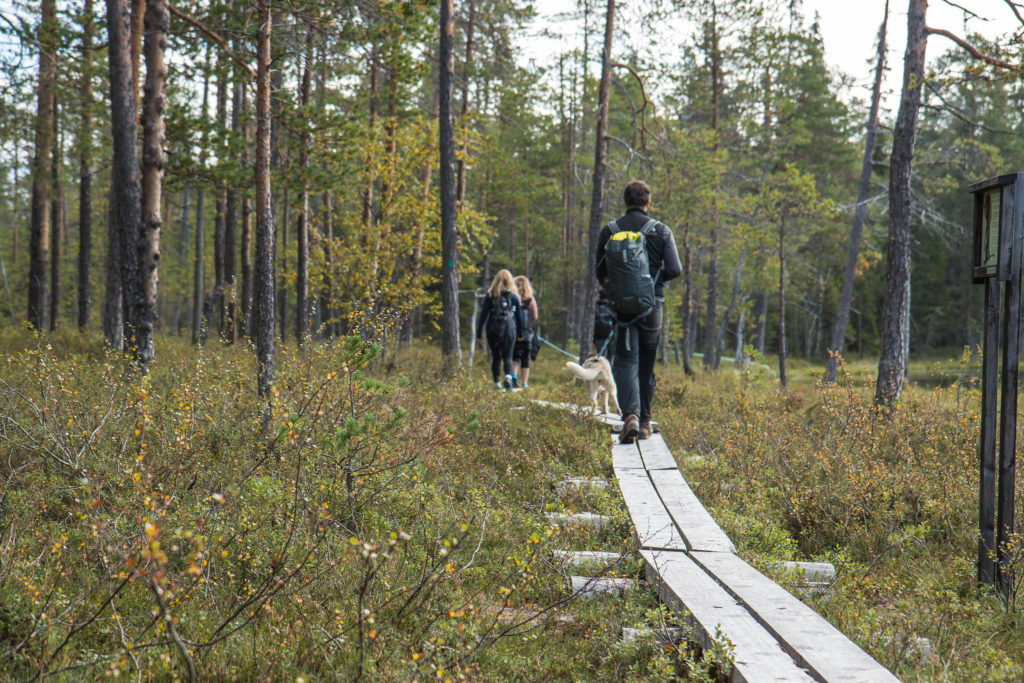
Using leading lines
#6: Foreground, middle ground and distance makes for more interesting landscapes
Landscapes can make dull photographs. That gorgeous scenery you fell in love with on your travels can be underwhelming in a photograph. The secret is to compose the picture so there is something of interest in the front, middle and distance. It can be a fence, hedge, stones, signpost or animal in the front, a line of trees in the middle and then mountains or cloud filled sky in the distance. Look for an angle that builds in elements at each of these three areas. It will tell more of a story and make for more interesting pictures.
For example, in this picture I moved around to have the entrance statue and people in the foreground, the lower level of buildings in the middle and then the castle in distance. It made the scene much more of a story and engaging

Using foreground, middle and distance composition
Here I used a sign in the foreground to create a more telling and engaging picture of Red Rock Canyon near Las Vegas
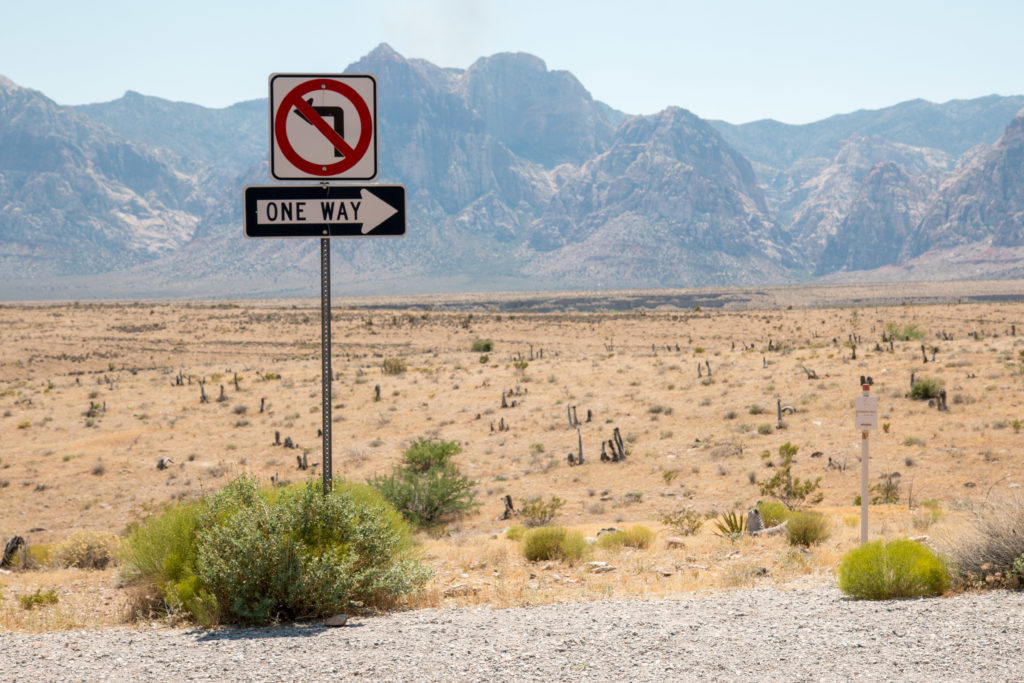
Using foreground, middle and distance composition
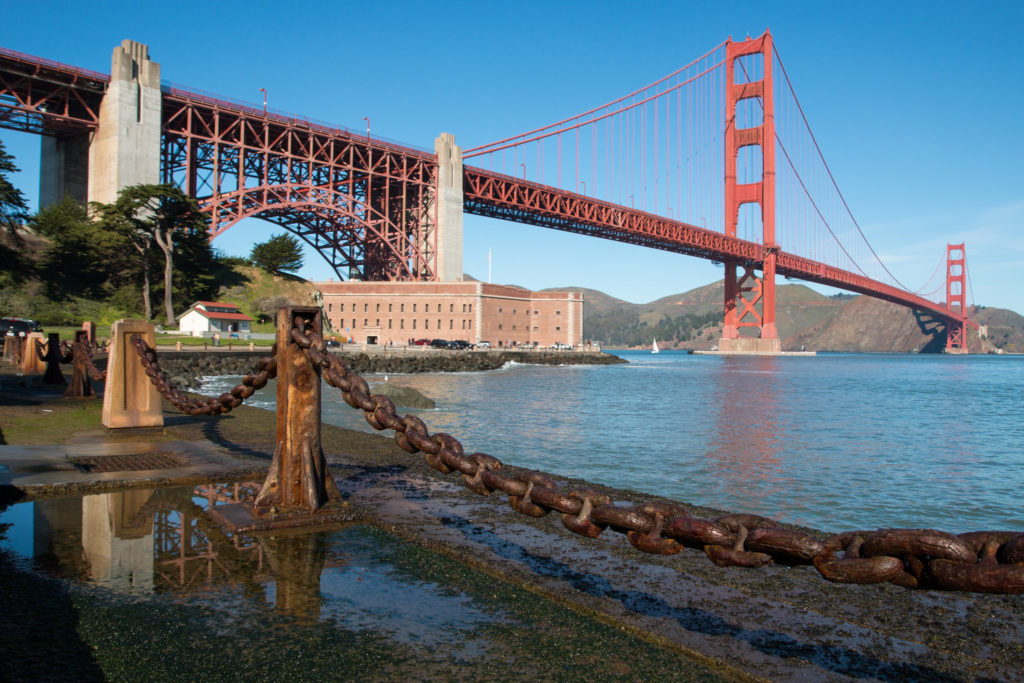
In this picture of the Golden Gate Bridge in San Francisco by getting down low having the chains in the foreground, buildings at the base in the middle and then bridge in distance gave a more unique take on this much photographed icon
Using foreground, middle and distance composition
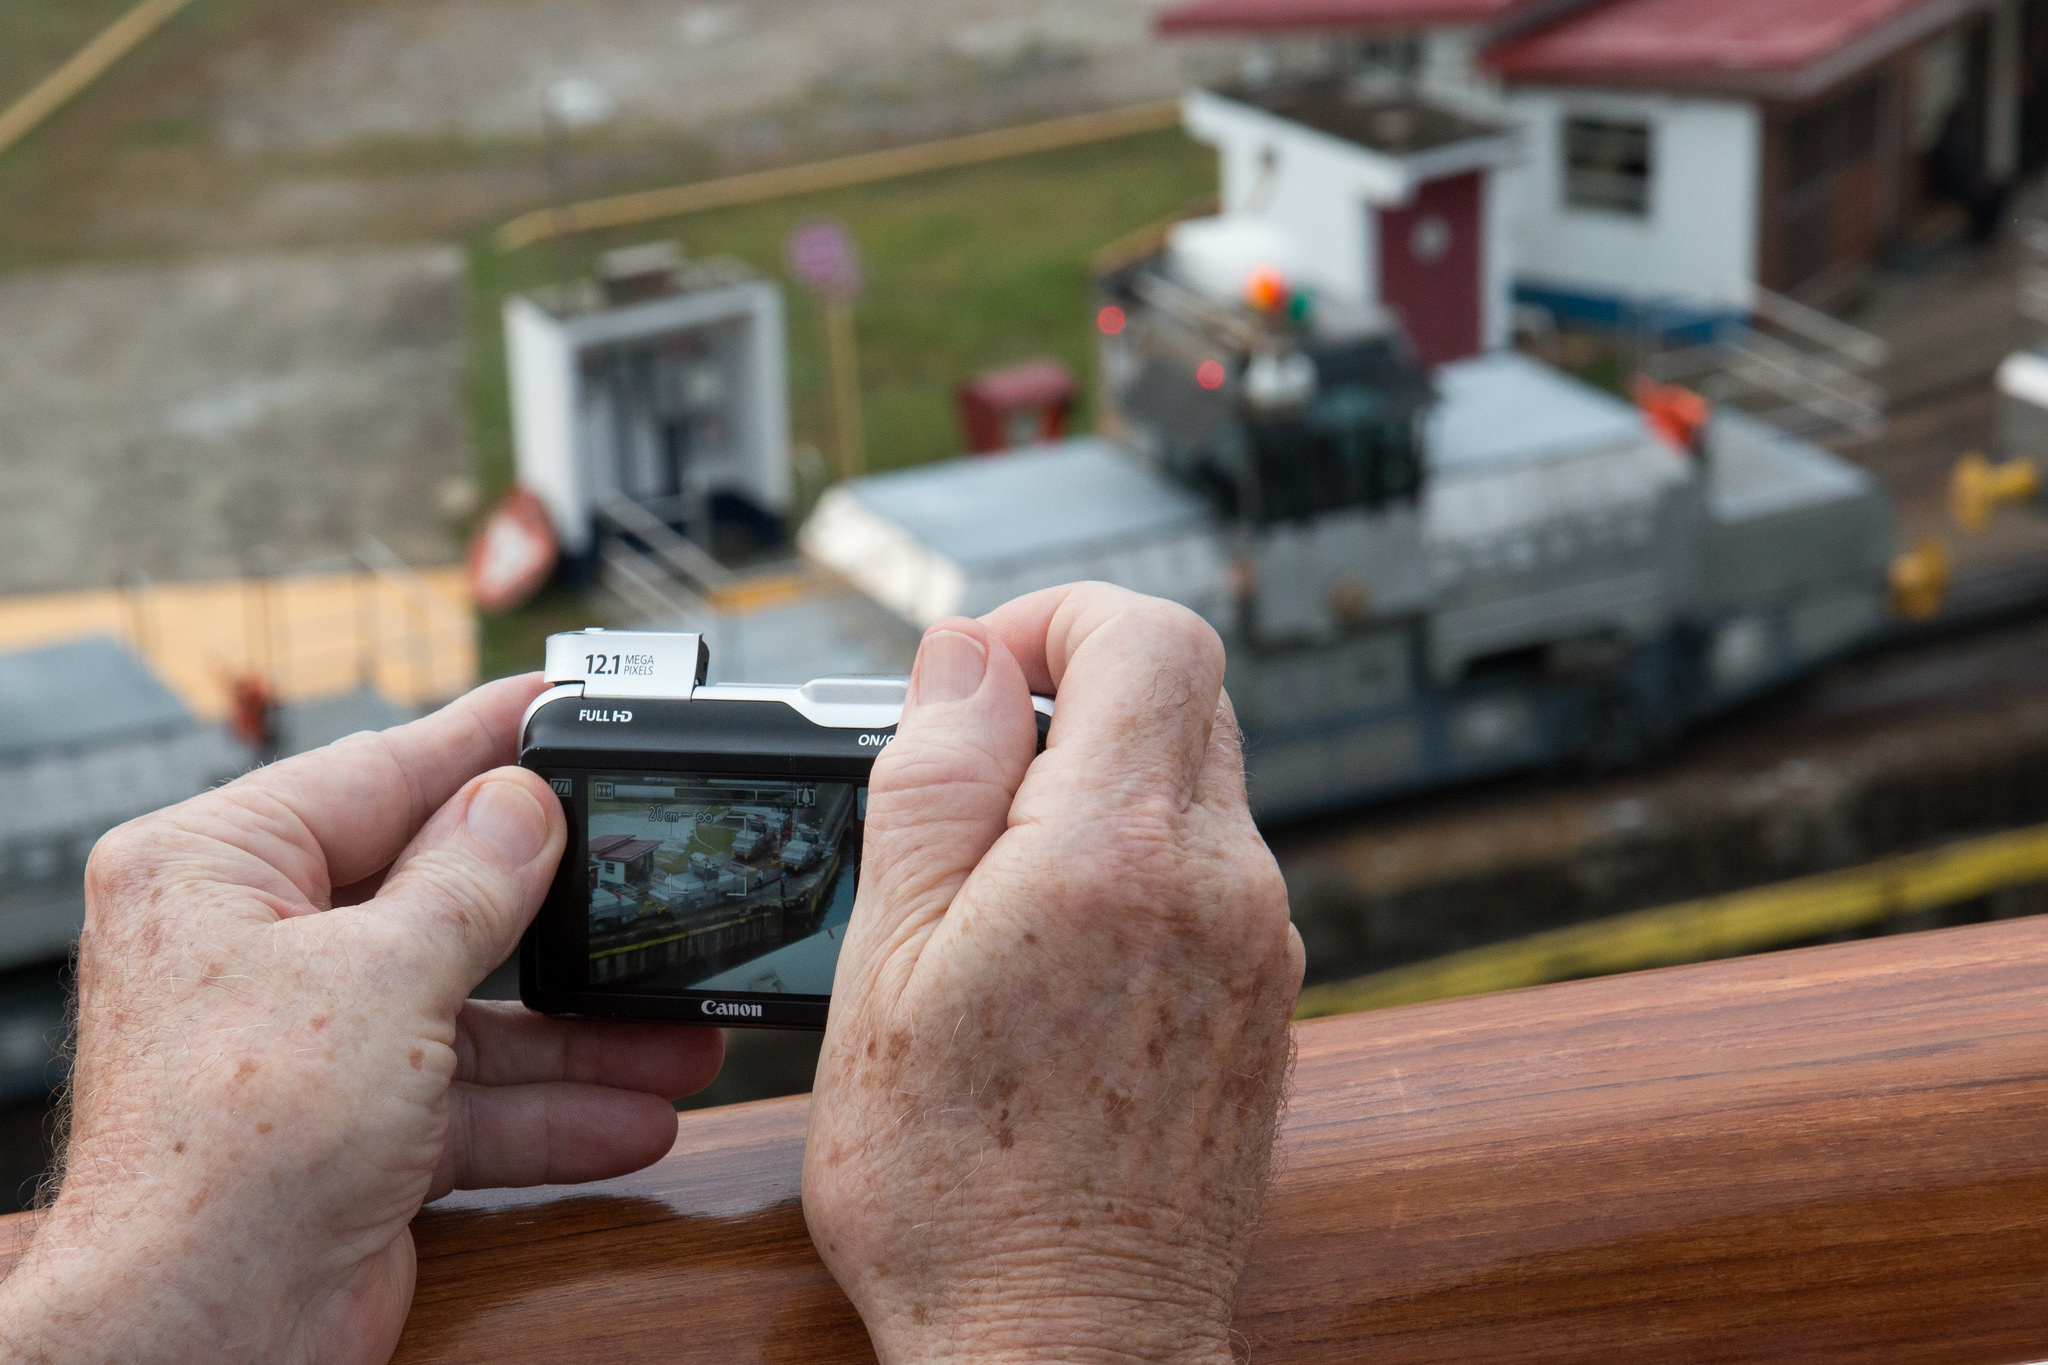
#7: Best time of day for pictures is sunrise and sunset
It’s called the “Golden Hour” and takes place twice a day: just after daybreak and before sundown. This is when professional travel photographers prefer taking photographs. The light is at its best as its softer and has a warmer tone. It creates better shadows and richness of colours. It also tends to be when places are less crowded. By midday, when most people are out sightseeing, the sun is harsher and more shadows are cast downwards.
The hour just after the sun rises and before it sets is when you have the greatest chance of capturing gorgeous pictures. Of course it is also when you can take great photos of sunrises and sunsets – which people always seem to like!
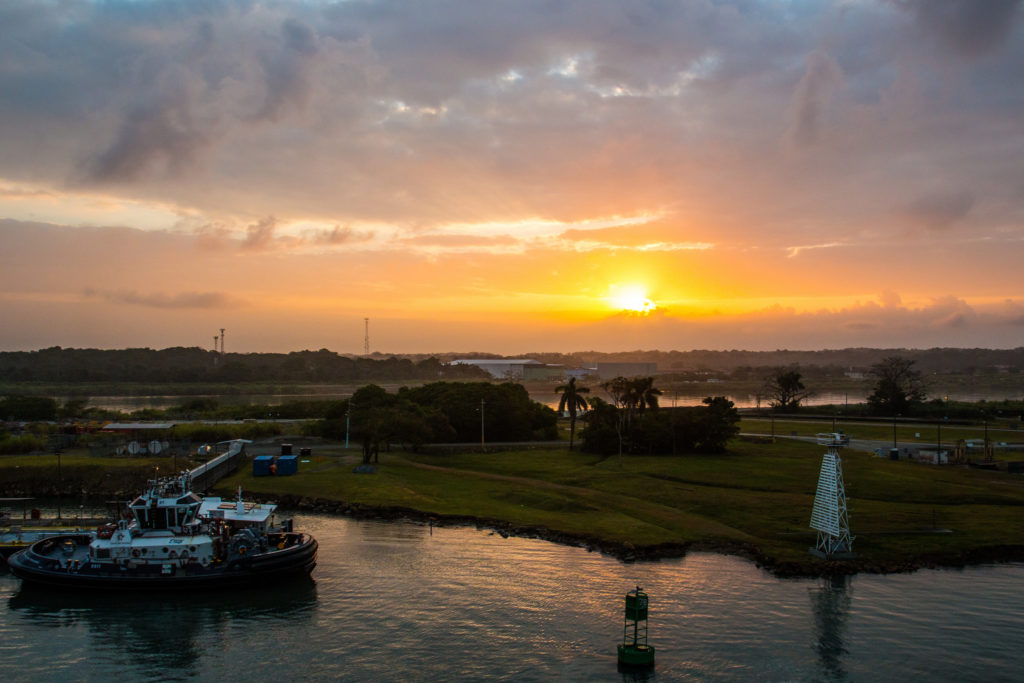
For example, I took this picture at about 6am as the sun was coming up as we headed into the Panama Canal
Using morning “golden hour”
And this at the Neon Museum in Las Vegas before the sun went down

Using evening “golden hour”
#8: Get close
Even when you think you are close enough to take a good picture, go closer. The detail of your subject is more interesting than a wider shot of it. So get really tight on a subject. Even when you think you are close, keep going. It will surprise you at how much more emotive and fascinating your pictures will be.
I usually start by taking a wide shot and then keep getting closer and closer to focus on elements and details. This makes for an intriguing image that the viewer will get drawn into and build a story around. Next time you watch a film or TV show look at how much time the director spends on being close to the characters and action. This is what people like and respond to. Focus on the parts and elements of the subject and not the entire thing.
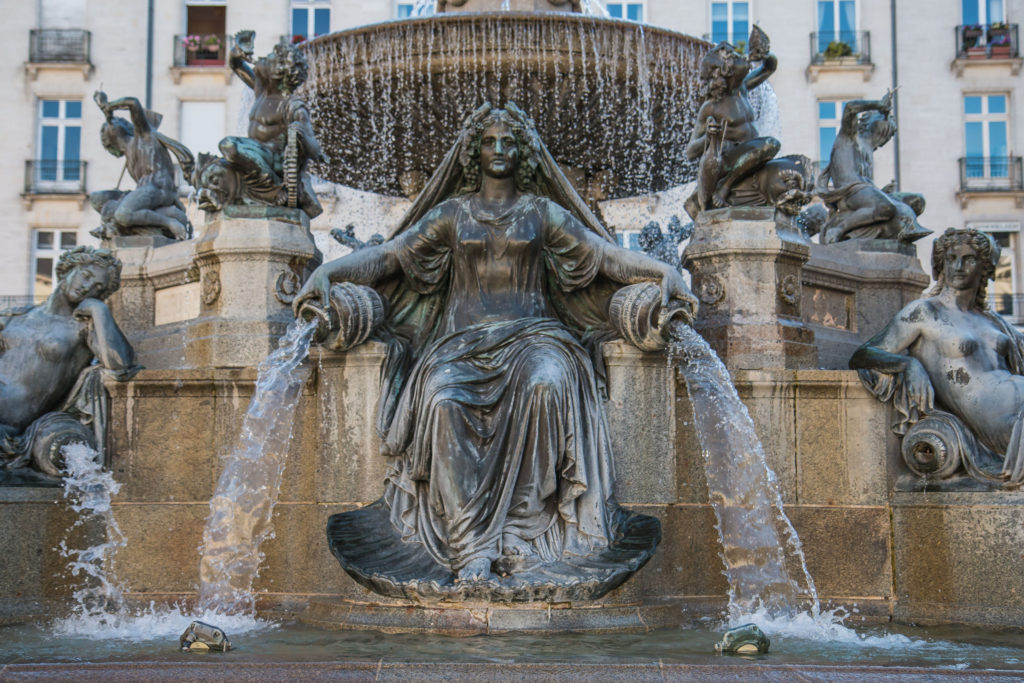
For example, while everyone was taking pictures of the entire fountain below in Nantes I got close to focus on the central character and water flow.
Getting closer to the subject
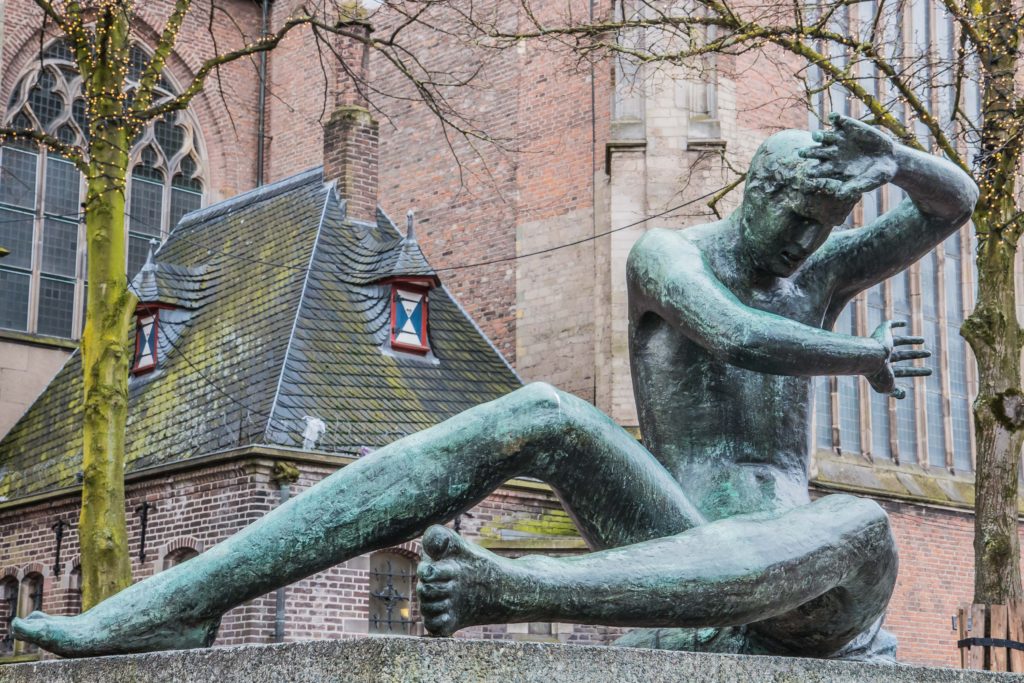
While in Arnhem I got right up to the face of the statue and created this dramatic image, which is slightly spooky and always gets a strong reaction from people viewing it.
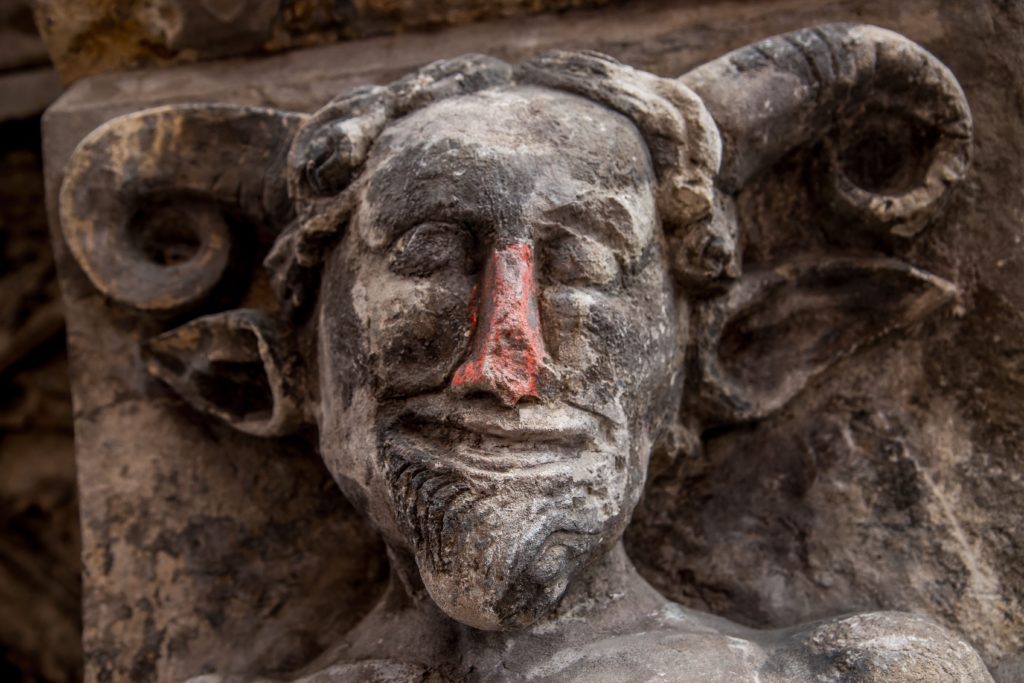
Getting closer to the subject
While made this statue fill the whole of the image.
Getting closer to the subject
These chains of paper birds in Nagasaki looked intriguing and more beautiful by getting right up to them

Getting closer to the subject
#9: Get Up High or Go Low
We see the world from eye level and you will get the more surprising and interesting pictures by either getting up higher and lower than this normal angle. We are used to seeing things at one level and height, and so change the dynamic in your pictures by avoiding taking pictures from a standing position. Find something to stand on, go higher up on some stairs or crouch down and look up at the subject. Changing the perspective will add interest to most subjects, and reveal a different and unexpected angle on familiar sights. It is an easy thing to do.
Shot of Husky in Finland by crouching down to be level with the dog
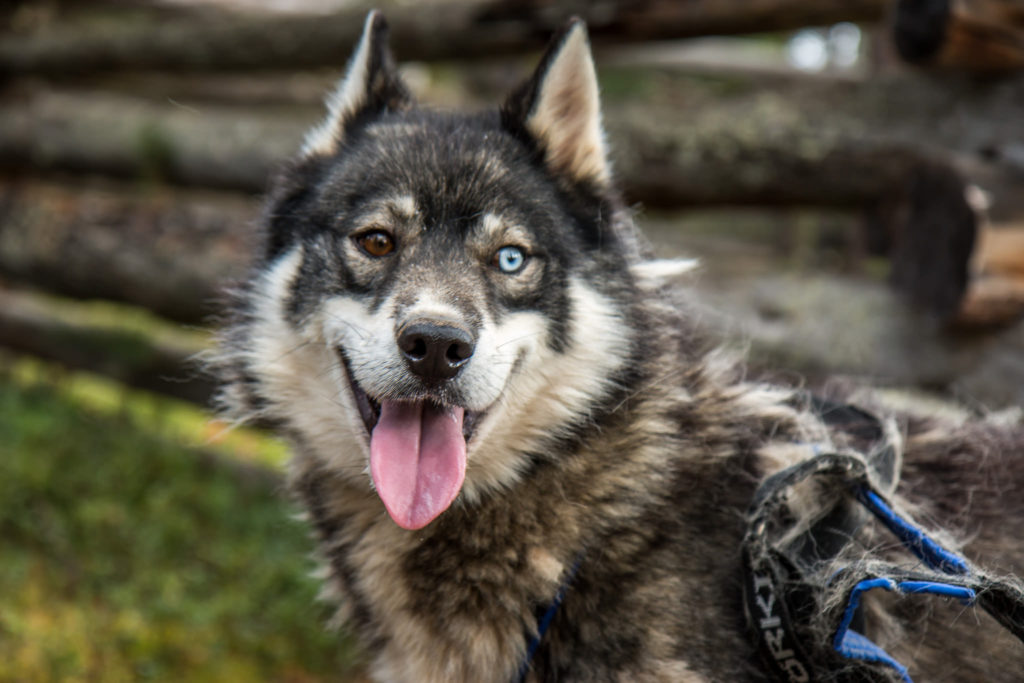
Getting down and away from eye level
This is what the shot of these totems collected by Tito looked like from eye level and below once down in line with them. Big difference!
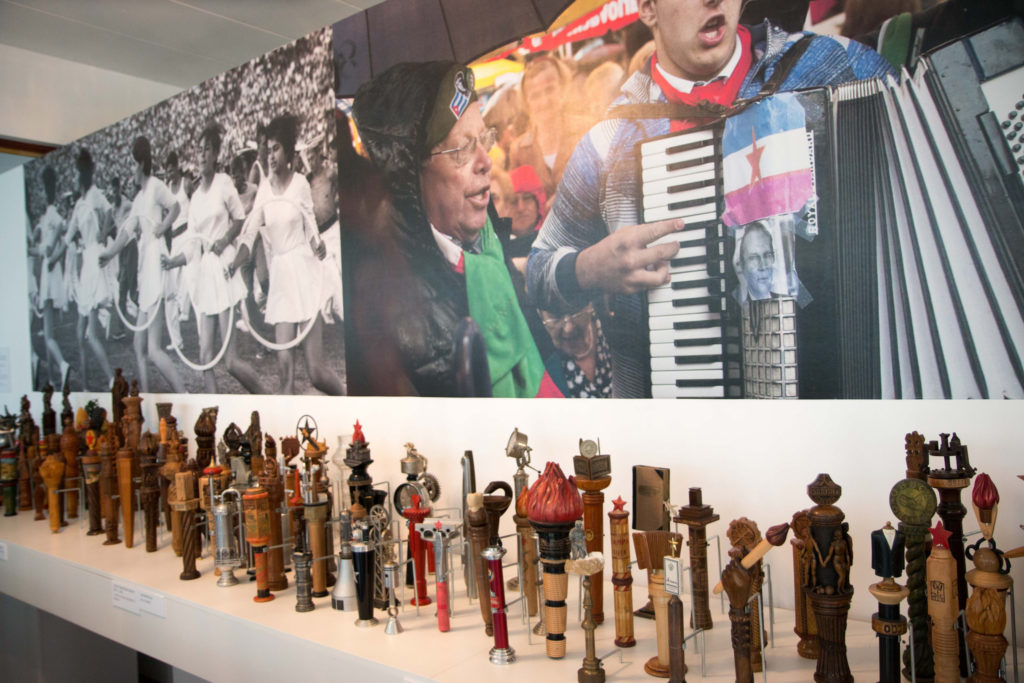
Eye level view of the subject….
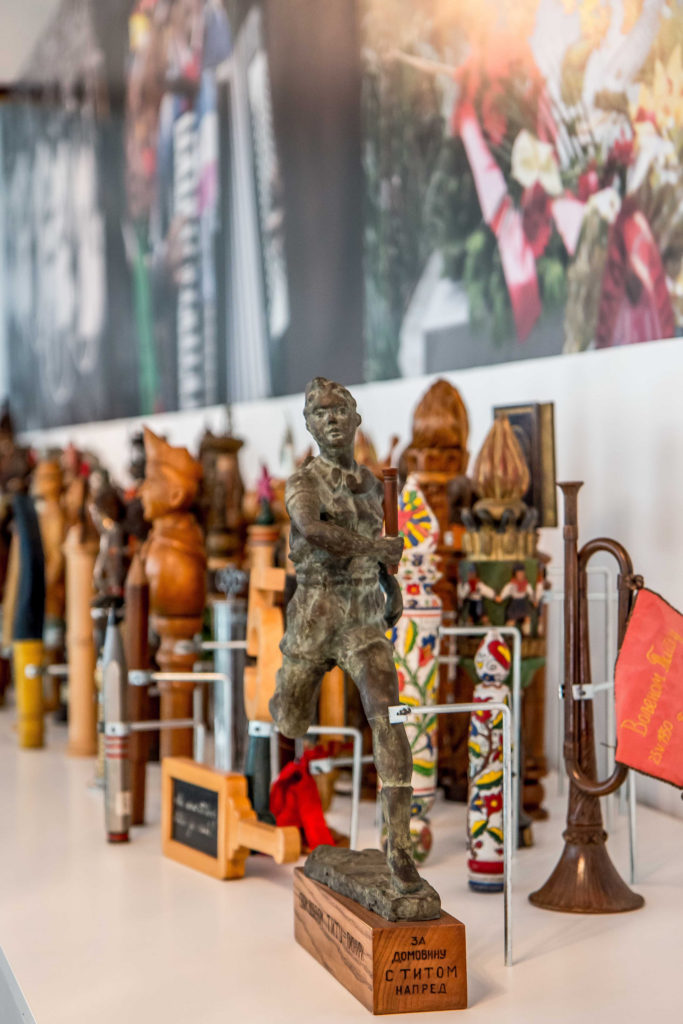
Getting down and away from eye level
Taking a look from above
Getting up and away from eye level
Getting up and away from eye level
#10: Switch off the flash and use it sparingly
Try and use natural light and avoid using your flash. Set it as default to “off”. The best or only use of your flash should be when shooting pictures when sun is up above you and it is casting shadows across your subject’s face or surface. Use the flash to compensate and fill light in.
The flash on your phone (or even built into a camera) is not that great anyway, which is why you see professional photographers using light attachments or stand alone lights if they need extra light. Instead of using your flash take pictures using natural lighting or room lighting when possible. If there is a lamp, fire, or sunlight use it and you will usually be pleasantly surprised at the great effects and tones in the photos.
And remember a flash will not help you even the slightest taking a picture of something in the distance.
Here is an example of a picture I took inside the dark Church of the Holy Sepulchre in Jerusalem without a flash. I think they created a moody and atmospheric feel that better captured the spirit of this holy place.
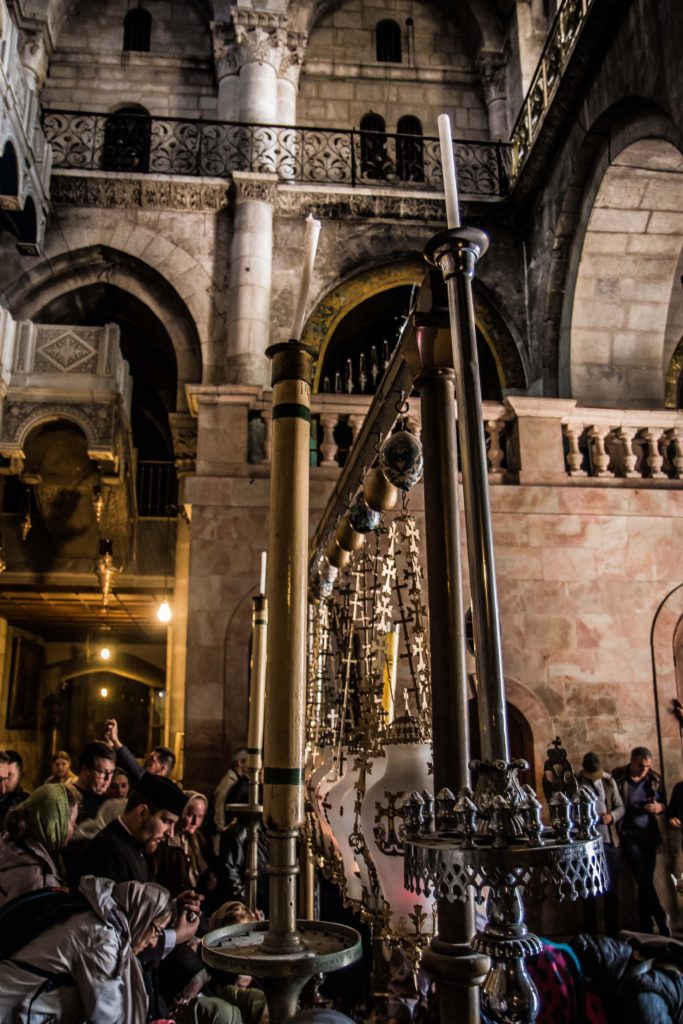
Using natural light and no flash
And this photo of candles inside a shrine in Kyoto Japan.
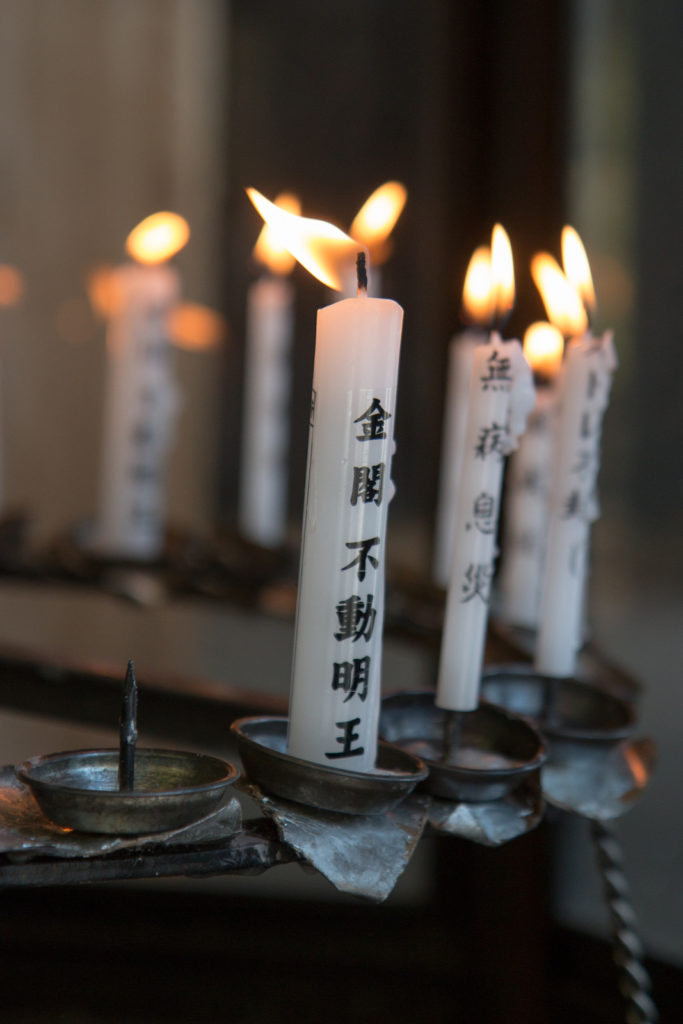
Using natural light and no flash
#11: Use both landscape and portrait formats
As I have shown with my examples, you should experiment with both landscape shape and portrait shapes when taking pictures. They give different aspects and will bring more variety to your photographs. It will also encourage you to be more adventurous and look at things on varied ways. I found all sorts of exciting new takes on what I was shooting through simply turning my camera around and shooting in portrait too. try it
#12: Use post-production tools to get that “professional look”
The pictures you admire and see published in magazines, on Instagram and Pinterest have almost certainly been through post-production in Lightroom or Photoshop to boost colours, sharpen or crop them to make them better and more dramatic. So to match their look and quality you should consider doing the same.
This can be done for easiest and for free using the tools built into your SmartPhone. It will do an automatic boost with one click, or you can choose to adjust each item like colour, exposure, sharpness and crop.
These are where you find them on Apple iPhone and iPad.
There are also free editing software tools online or Apps for your phone. I recommend trying them before considering costly programs like Adobe Lightroom or Photoshop. Some options include:
- Google Photos: https://photos.google.com
- Gimp https://www.gimp.org
- PhotoScape http://www.photoscape.org
- Pixlr https://pixlr.com
- Apps (some are paid-for options): PhotoToaster, Juxtaposer, LensLight, AlienSky and DistressedFX
Final thought
Create some mystery
Aim to tell a story with your pictures. Get viewers drawn in and interested in what’s going on in the scene you are photographing. Build some intrigue and mystery into your photos by taking pictures that get them reacting with “who is that person?”, “what are they doing, and why?” or “what exactly is that?”
You do not have to be explicit and clear in every picture you take. Some mystery will get people to stop and get involved. This then gives you a chance to explain what you saw, felt, experienced or learnt. The best travel photos you take will be the ones that people pause on to savour and explore. Remember that and by using some of the tips above you will create amazing travel pictures that your friends and family will be eager to see on your return
Share your pictures
I hope you find these tips inspiring and helpful and look forward to hearing from you and seeing results if you give them a try. Please leave a comment and links to any pictures you are pleased with from using any of these tips.
You can follow my pictures on Flickr (https://www.flickr.com/photos/tipsfortravellers/) and Instagram (http://www.instagram.com/tipsfortravellers)
Free eBook
Download my free “SmartPhone Photography Tips For Travellers” eBook PDF with all the tips and lots more examples: https://www.tipsfortravellers.com/SmartPhonePhotoTips
If you enjoyed this post:
- Follow Tips For Travellers on: YouTube, Instagram, Facebook, Twitter and Pinterest.
- Sign up for the monthly newsletter. includes a free eBook to download every month.
- Never miss a post by signing up for the Latest Tips For Travellers email.
Want to Support Tips For Travellers?
- Book a cruise via The Tips For Travellers Cruise Line: email / UK Phone 0800 852 7801/ Ex-UK +44 1273 836 639
- Next time buying on Amazon USA or Amazon UK click on these links
- Become a supporter via Patreon
- Make a donation via PayPal
Discover more from Tips For Travellers
Subscribe to get the latest posts sent to your email.
These are great tips! I really like taking photos from above too. I love the quality of photos my iphone takes. That’s really cool you went to the neon boneyard museum in Vegas! We tried to go on our last visit and didn’t know you needed a reservation! Whoops! When we go back we have to be ready with our iphones! Apparently, they don’t allow DSLRs!
Thanks!! The Neon Museum is awesome. haven’t been for a few years but likely heading to Vegas mid May for a week or so and it is back on my list!
I am an iPhone user and I found that the tips you put online have been a great help. I can’t believe I never knew about these things!
Great to hear they helped! Thanks!